How to Fix Undercooked Pizza Dough: Your Kitchen Rescue Guide
You’ve spent the afternoon kneading dough, dreaming up toppings, and getting your kitchen to smell like an Italian pizzeria. You pull your homemade pizza from the oven, the cheese is bubbling and golden, and your mouth is watering. But then-disaster! You cut a slice and the bottom is pale, limp, and worse, a little raw. Ugh. If you’re anything like me, you’ve probably stood there, pizza cutter in hand, wondering where you went wrong.
Don’t worry, you’re not alone. Undercooked pizza dough is a rite of passage for every home pizza maker. The good news? It’s totally fixable, and even better, preventable. Let’s roll up our sleeves, dust off some flour, and walk through how to rescue your pizza and make sure this never happens again.
Why Does Pizza Dough Stay Undercooked? (And Why It’s Not Your Fault)
Let’s get this out of the way: home ovens are not Italian wood-fired pizza ovens. Most home ovens max out at 500°F, while those glorious brick ovens in Naples hit 900°F. That means we have to work a little smarter to get that crisp, fully cooked base.
Here’s what usually sabotages our pizza dreams:
- Oven not hot enough: If the oven isn’t blazing hot, the dough just won’t cook through before the cheese burns.
- Stone or steel not preheated: If you’re baking on a cold stone or baking sheet, the bottom of your pizza doesn’t stand a chance.
- Too much sauce or cheese: I know, it’s tempting to pile it on, but too much moisture is a recipe for soggy dough.
- Dough too thick: Thick crusts are delicious, but they need more time and heat to cook through.
- Wet toppings: Fresh mozzarella, mushrooms, and veggies can release a ton of water as they bake.
- Cold dough: Dough straight from the fridge takes longer to cook, and often stays dense in the middle.
I’ve made all these mistakes (sometimes all at once!), so trust me, there’s hope.
How to Tell If Your Pizza Dough Is Undercooked
If you’re not sure whether your pizza is fully baked, here’s what to look for:
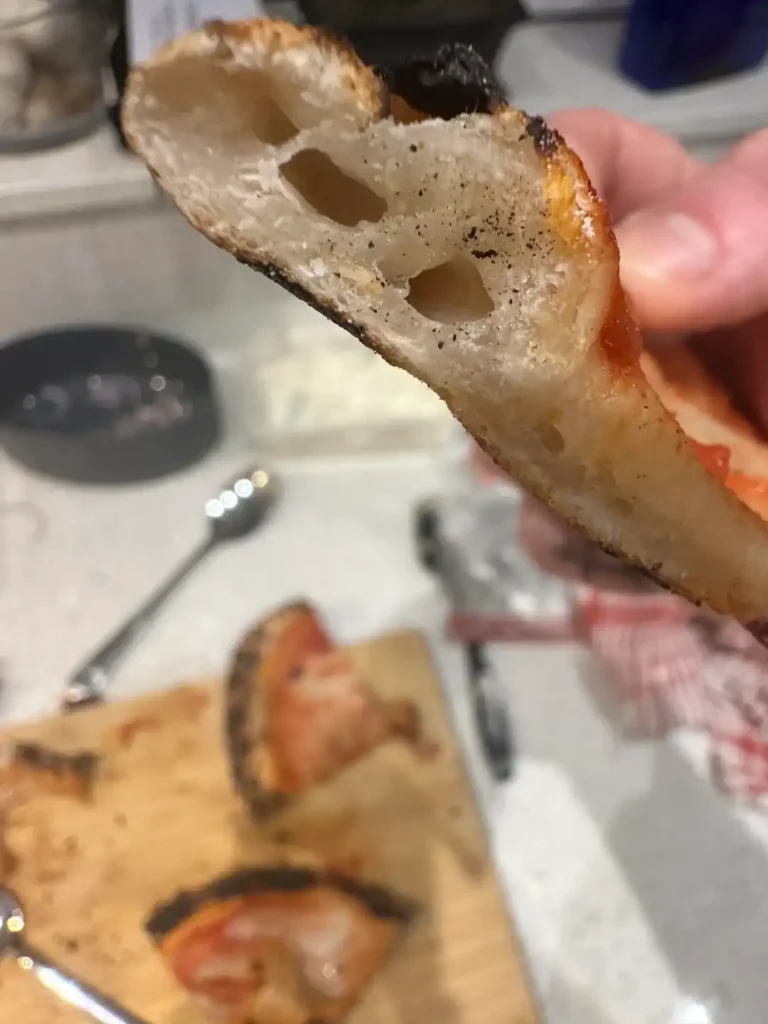
- The bottom is pale or white, not golden brown or crisp.
- The center feels gummy, sticky, or even raw when you bite in.
- The cheese might look perfect, but the crust is limp and floppy.
- Toppings might be cooked, but the base is soft and almost dough-like.
If you see any of these signs, don’t panic! There’s a fix.
Rescue Mission: How to Fix Undercooked Pizza Dough
1. Back in the Oven, Stat!
The simplest fix is to pop your pizza back in the oven. But here’s the trick: move it to the lowest rack, directly above the heating element. If you’re using a pizza stone or steel (which I highly recommend), slide the pizza right onto it. Give it another 2-5 minutes. This direct heat will help crisp up the bottom without burning the top.
Pro tip: If you built your pizza on parchment paper, slide it out from underneath halfway through baking to let the crust get direct contact with the stone or steel.
2. Skillet Sizzle
This is my favorite pizza rescue hack. Heat a large nonstick or cast iron skillet over medium heat. Once hot, slide in your undercooked pizza (a slice at a time works best). Cover loosely with a lid or foil and cook for 2-3 minutes. The skillet will crisp up the bottom beautifully, and the gentle steam will finish the dough without drying it out.
3. Broiler Blitz (For Toppings That Need Help)
If your toppings or cheese look underdone but the crust is almost there, turn on your broiler for a minute or two. Keep a close eye on it-broilers can go from golden to burnt in seconds! If the crust is already perfect, cover the edges with foil to protect them.
4. Microwave for Emergency Fixes
Okay, this isn’t the most gourmet solution, but if you’re reheating delivery pizza or just need to finish the dough, a quick 20-30 seconds in the microwave can help. It won’t crisp the crust, but it will make sure the dough isn’t raw. For a better finish, combine with the skillet method above.
How to Prevent Undercooked Pizza Dough (Next Time)
Now that you’ve rescued tonight’s dinner, let’s make sure you never have to do it again. Here’s what I’ve learned after years of pizza experiments (and a few disasters):
1. Preheat Like You Mean It
This is the number one mistake I see. Your oven’s preheat light might ding after 10 minutes, but your pizza stone or steel needs at least 45-60 minutes to get ripping hot. If you don’t have a stone or steel, use a heavy baking sheet, flipped upside down, and preheat that too.
Chef’s confession: I once put a pizza on a barely-warm stone and ended up with a pizza that was both burnt and raw. Don’t be like me. Preheat!
2. Crank Up the Heat
Set your oven to the highest temperature it will go (usually 500°F or 260°C). Pizza loves heat. The hotter, the better.
3. Stretch It Thin
Thick crusts are delicious, but they need extra time and care. For most home ovens, a dough that’s about 1/4 inch thick is the sweet spot. It cooks through quickly and gets that lovely crispness.
4. Go Easy on the Sauce and Cheese
I know, I know-more is more, right? Not with pizza. Too much sauce or cheese traps steam and moisture, making it almost impossible for the dough to bake through. Use a light hand, and save the extra cheese for the breadsticks.
5. Prep Your Toppings
Fresh mozzarella, mushrooms, and veggies are notorious for releasing water. Drain your mozzarella on paper towels, sauté mushrooms and onions before adding them, and avoid piling on raw watery veggies.
6. Bake Immediately After Assembling
Don’t let your topped pizza sit around. The longer it waits, the more moisture seeps into the dough. Build your pizza on a peel or parchment, and slide it into the oven as soon as it’s ready.
7. Rotate for Even Cooking
Halfway through baking, rotate your pizza 180°. Most home ovens have hot spots, and this helps ensure an evenly baked crust.
8. Par-Bake for Thick Crusts
If you love a chewy, thick crust, try par-baking the dough for 5-7 minutes before adding toppings. This gives the interior a head start and prevents a raw, doughy center.
Real-Life Pizza Problems (And How to Solve Them)
Let’s tackle a few common pizza disasters, with fixes straight from my own kitchen:
Q: Why does my pizza always come out soggy in the middle?
A: Too much sauce or cheese, wet toppings, or not enough oven heat. Try using less sauce, pre-cooking veggies, and making sure your oven and stone are fully preheated.
Q: My crust is burnt but the base is still raw. What gives?
A: Your oven’s heat is too top-heavy, or your stone isn’t hot enough. Try lowering the rack and letting your stone preheat longer. If needed, cover the top with foil to protect it while the base finishes.
Q: Can I use a regular baking sheet instead of a pizza stone?
A: Absolutely! Flip it upside down, preheat it with the oven, and bake your pizza directly on it. It won’t hold heat quite like a stone or steel, but it’s a great hack.
Q: What’s the secret to crispy pizza at home?
A: High heat, a well-preheated stone or steel, thin dough, and minimal toppings. And don’t forget to rotate!
Pro Tips from My Pizza-Making Adventures
- Invest in an infrared thermometer: It’s the best way to check if your stone or steel is truly hot enough (aim for 500°F+).
- Use parchment paper for easy transfers: Build your pizza on parchment, slide it onto your stone or sheet, then remove the paper halfway through baking.
- Don’t be afraid to experiment: Every oven is different. Keep notes on what works in yours-times, temps, rack positions, and favorite dough recipes.
- Practice makes perfect: The more pizzas you bake, the better you’ll get at reading your dough and oven.
Final Thoughts: Turning Pizza Fails Into Pizza Wins
Every great pizza maker has pulled a soggy, undercooked pie from the oven at least once. The secret is not to give up. With a few tweaks-hotter oven, thinner dough, less topping, and a well-preheated stone-you’ll be turning out pizzas that make your family and friends beg for another slice.
And if disaster strikes? Now you know exactly how to rescue your pizza and turn it into a triumph. So next time you’re in the kitchen, remember: pizza making is as much about the journey (and the laughs) as it is about the destination.
Happy baking-and may your crusts always be golden and crisp!