How to Use an Outdoor Pizza Oven: New Favorite Way to Make Pizza
Let’s be real. Pizza is more than food-it’s a reason to gather. I’ve seen it myself, from crowded family kitchens to backyard get-togethers. There’s just something about that smell of baking dough and bubbling cheese that makes everyone smile. And when you make pizza in an outdoor oven? It’s next-level. You get that crispy crust, a hint of smoke, and a little adventure every time you fire it up.
If you’re new to this, welcome. I’ll walk you through everything-no fancy chef hat required. Just some good dough, a hot oven, and a little patience.
A Little Pizza Backstory
Did you know pizza goes way back? People have been baking flatbreads for ages, but it was in Naples where pizza really became an art. The secret? Hot, domed ovens that cook pies in a flash. Now you can get that same magic at home, whether you bought a shiny new oven or built one from bricks in your backyard. I started out with a cheap metal oven and a lot of burnt crusts, but every mistake made my pizza better. That’s the fun of it.
Get Ready: Setting Up Your Pizza Station
Before you light anything, let’s talk setup. You want a sturdy, heatproof spot for your oven. Some ovens come with stands. If not, a concrete slab or heavy table does the trick. Keep your toppings, dough, and tools close by. Trust me, once that oven’s hot, you don’t want to run across the yard for your cheese.
Safety tip: Pick a spot with good airflow, away from anything that could catch fire. If you can, set up a little shelter. Rainy pizza nights are no fun.
Here’s what you’ll want on hand:
- Pizza peel (wood for sliding in, metal for turning)
- Infrared thermometer (to check how hot your stone is)
- Heat-proof gloves (those ovens get HOT)
- Pizza spinner or turning peel
- Bench scraper and dough boxes
- Cornmeal or semolina (helps keep dough from sticking)
- Long brush (for sweeping out ash and burnt bits)
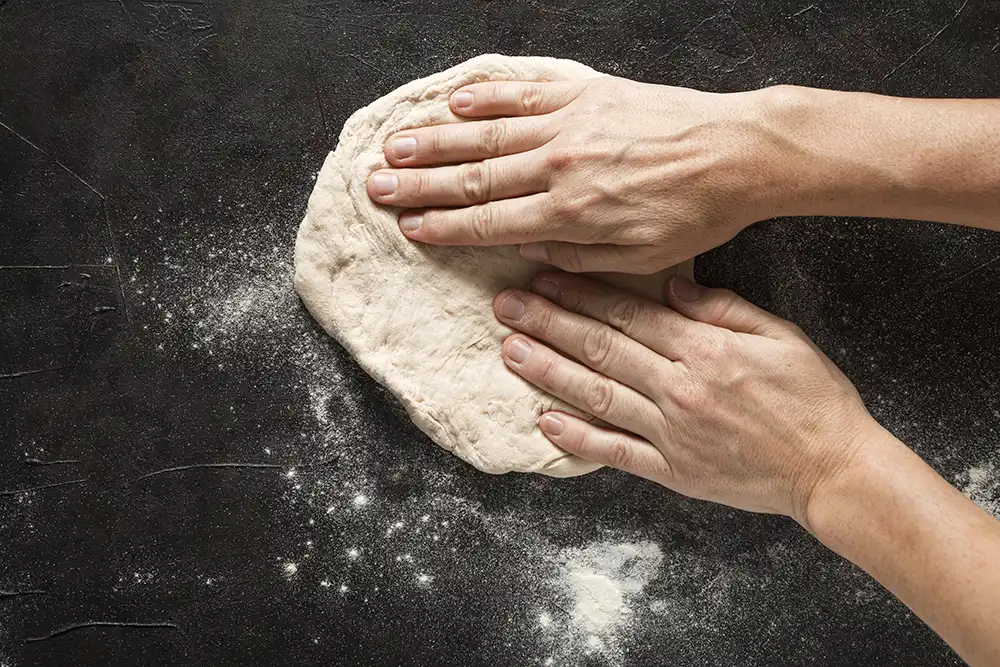
Dough: The Real Star
Good pizza starts with good dough. If you have time, make it the night before and let it chill in the fridge. That slow rise? It gives you flavor and chew. On pizza day, pull it out about an hour before you want to bake. Cold dough is tough to stretch and tears easily.
Pro tip: Dough that’s rested is soft and puffy. If you’re in a rush, store-bought dough works, but homemade is worth the extra step.
Prep Like a Pro
Ever hear the phrase “mise en place”? It just means “get your stuff ready.” Grate your cheese, slice your veggies, portion your sauce. Keep it simple-three or four toppings is plenty. Too much stuff and your pizza will be soggy and tough to slide into the oven.
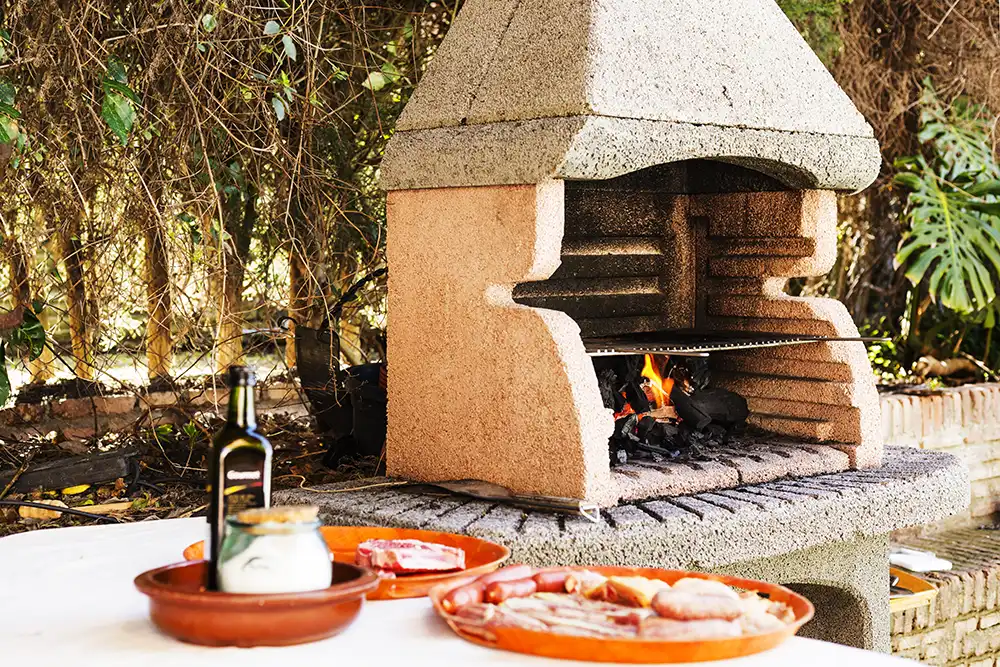
Lighting the Oven
Wood-fired ovens:
Start with dry hardwood-oak and maple are great. Stack some kindling, light it up, and once it’s going, add bigger logs. It can take up to two hours to get to pizza temp (700–900°F). Don’t rush it. Steady heat is what you want, not a raging fire.
Gas ovens:
Turn the knob, hit ignite, and let it preheat for 30–45 minutes. Use your thermometer to check the stone. For Neapolitan pizza, you want at least 700°F.
Shaping and Topping
Flour your hands and the counter. Press your dough into a disk, then stretch it out-aim for about 12 inches. You want it thin in the middle, thicker around the edge. Dust your peel with cornmeal or semolina so the dough slides off. Go easy on the sauce and cheese.
Quick check: Give the peel a shake before you head to the oven. If the pizza moves, you’re good. If not, lift the edge and toss a little more flour underneath.
Baking: The Fun Part
Slide your pizza onto the oven floor, close to the flames but not right in them. Leave the oven door open. Rotate the pizza every 20–30 seconds so it cooks evenly. This isn’t the time to check your phone-pizza can go from perfect to burnt in a heartbeat.
Baking times are quick:
- 800–900°F: 90 seconds to 2 minutes
- 650–750°F: 2–3 minutes
Look for a golden crust and bubbling cheese. That’s your sign it’s ready.
Time to Eat
Use your peel to take the pizza out. Let it rest for a minute, then slice it up. That first bite? Crispy, smoky, cheesy. Nothing beats it.
Troubleshooting & Tips
- Sticking to the peel? More flour or semolina. Always check before launching.
- Uneven cooking? Rotate more, or try a different spot in the oven.
- Burning? Move the pizza away from the flame or lower the temp.
- Soggy base? Use less sauce and toppings. Make sure your oven is hot enough.
Dough Measurements Table
Here’s a quick guide for dough weights and sizes:
| Pizza Size | Dough Ball | Flour | Water (65%) | Salt | Yeast |
|---|---|---|---|---|---|
| 10-inch | 180g | 110g | 72g | 2g | 0.5g |
| 12-inch | 250g | 150g | 98g | 3g | 0.7g |
| 14-inch | 320g | 190g | 124g | 3.5g | 1g |
Make as many as you need. Leftover dough makes great breadsticks!
More Than Pizza
Once you get the hang of it, try baking bread, roasting veggies, or even searing a steak in your oven. The smoky heat does wonders for all kinds of food.
Final Thoughts
Outdoor pizza ovens are more than a kitchen gadget. They’re a reason to gather, experiment, and have fun. Don’t stress about making the “perfect” pizza. Some of my best memories are from laughing with friends, flour everywhere, and the smell of wood smoke in the air.
So fire up your oven. Trust your gut. Enjoy the process. And remember-every pizza is a new adventure.
Happy baking! If you have questions or want to share your pizza wins (or fails), I’m all ears. Let’s make great pizza together.